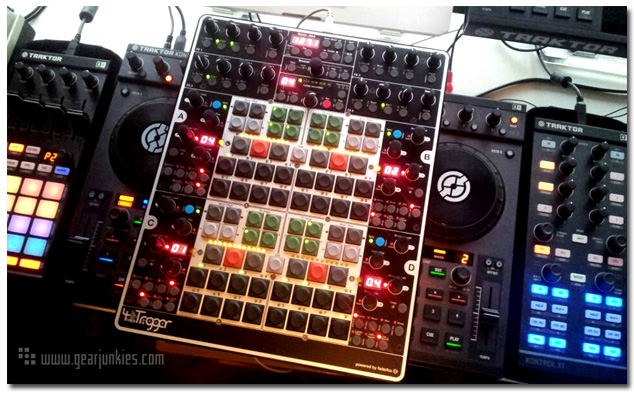
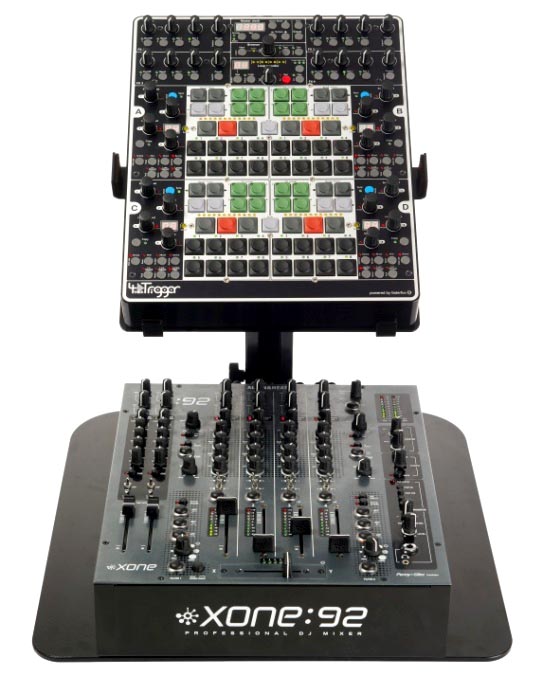
The 4TrackTrigger, in the user manual introduced as “Hardware for Sophisticated DJs“. Only by looking at the controller you know that’s a true statement. During the unpacking and unboxing you immediately feel the solid german quality of Faderfox and you see the complete control we are used to know from the Swiss Glanzmann Digital DJ Solutions (4MidiLoop). Just hear me out: 150 push buttons (of which 78 super-responsive), 17 endless rotaries, 17 potentiometers, 6 dispalys and 188 LEDs. In addition, there are two options to use a footpedal, so you can ‘trigger by foot’ too. All of this hand built and far from mass production. So there is this ‘reasonable’ “big” price tag of 1500 Euros (excl. VAT). However, for ‘gearjunkies’ like us a great device to play with and a pleasure to do a review with. And that’s what I did!
Installation
The installation of the unit was pretty easy and straight forward. Connect the controller, start up Traktor, load the .tsi file (don’t forget to set the in/out ports) and … ‘start your engines mr. DJ’! Before you know it you are messing around  with four decks and four FX units. With my background with my Kontrol S4 – in combination with my X1 – I am (kinda) used to a afir amount of buttons and knobs. However this is a complete new level with the 4TrackTrigger! This device requests, … no, demands that you start to push all these buttons and knobs. It’s almost like slamming them in ‘Arcade Style’, like I did on the Streetfighter Arcade machines. And because of the sense of quality and feeling of the trigger buttons and controls, you can! This is not a controller that has to be treated with kid gloves.
After the initial introduction to the 4TrackTrigger you’ll want to look for some specific functions and here’s where it starts to get a bit complicated. With the huge amount of buttons, controls, knobs, etc. there’s a lot to control within Traktor. To get the most out of the controller you probably have to read the manual at one point or another. Just so you can figure out exactly which button what can do. To a certain level you can figure out many functions by reading the labels and with some trusty ‘trial and error’ action. Below I will describe the main functions and I will try to give an idea how extensive the 4TrackTrigger (4TT) is and what it is like to work with it.
Master Section
Not a complete surprise but the 4TT layout follows the Traktor layout. The master section is just like the software in the middle. A small screen shows the BPM (of the track that’s playing) to one number after the decimal point. If you are working with four decks, it’s nice to set the Master Clock as your master and the four decks as Slaves, which of course you can with the 4TT. A nice feature is that you can also pitch and bend the Master Clock via the 4TT. Little steps if you press the pitch buttons en bigger steps if you combine it with the shift button. If you want to sync the controller manually to external gear, you can do that by letting the Tap function do the rough work. Here you’ll find also the Clock Start/Stop and Reset function.
Loop recorder
Below the master section we’ll find the Loop Recorder, which can be operated very easily because of the Dedicated buttons. Within this section you can also operate the Record function of Traktor, the Record Input Gain included. Something that can be operated easily with your mouse, but it just shows how extended this controller really is. They really made sure they didn’t use any button too little, without having to use complicated double shift buttons or illogical button combinations.
Browser Section
On a controller like this you expect a comprehensive browser section and that’s exactly what you get. If you want to scroll through your tracks or playlists, all is possible. A feature I liked was the fact that, the faster you twisted the knobs the faster you could scroll, which is very welcome when you work with big playlists. If you combine the Browser button with the shift button you can control the Master volume and also you can turn the Quantize and Snap function on or off.
Effect Units
Traktor has four effect units (if you set it like this in your preferences). However on most controllers you only get two sections to operate them all. Not so on the 4TrackTrigger (hence the name)! This controller gives you four full controls on all four FX units. They are paired in two on the left and right. At first I would have preferred them to be located at each deck section, as I usually set one FX unit to one channel. However, during the time I worked with the 4TT I realized that the 4TT method works very nice and comfortably as well! This way it was much more handy to use the different units and combinations of them in a more dynamic manner. For example by using two units for the advanced filters and the other two FX units for the other effects.
On the decks themselves you can assign one (or more) effect units very easy. It is very handy to work with presets when switching through the different effects. Something I didn’t like was the fact that the Parameter on/off/set knobs of the four potentiometers aren’t straight below them. This can result in confusion of whether an effect is on or not. Especially when you are working with four decks at the same time and don’t have the time or overview to see if you are pressing the right button.
Decks
Due to the large amount of functions you can operate on each deck with the 4TT I could write a multiple pages long review only about this section, but … I will spare you of that. I will list a few of the most used functions. By way of Shift functions you can grid tracks, change deck layouts, set hot cue types, change key, browse, load tracks, change deck types, to name a few. The most important functions are of course the hot cues, a very enhanced loop section, cue/play, fx unit selection and pitch/bend control.
One button you probably won’t use often, but comes in very handy, is the copy button. With this button you can copy your deck to another deck of choice in no-time, which in the end gives you a lot more creative options. The LED strips are a pleasant addition. It shows where the track is and starts to blink when the tracks nears the end. Very handy when you are working with four decks at the same time.
Deck Hot Cues
Like I mentioned before with the 4TrackTrigger buttons and knobs you quickly start looking up expanding your creative boundaries. At first you need to get used to the mechanical clicks of the buttons. It feels and sounds like you are playing on an old computer keyboard. But as soon as you are into the music this feeling passes quickly. By means of LEDs the hot cue buttons are indicated if they are hot or not. Setting a hot cue is pretty much straight forward. Clicking on an empty hot cue sets it and with the shift button pressed it deletes it again. Something I really miss on a controller like this, is the fact that there are no colored LEDs. Meaning that there is no distinction between the different types of hot cues.
Deck Loop Section
With each deck there is a comprehensive loop section, which I haven’t seen yet on regular dj controllers. With two endless rotaries you can create a loop, set or change the size of it, and move it. However the 4TT doesn’t stop here. With different function buttons you can opt to use the second rotary to change the loop in or out of position or to do beatjumps. By pressing and turning the rotary you can also change the step-size of these functions. With this you get a load more creative options to make your audience crazy with -for example- a longer, self-made built up to a break instead of just ‘dropping’ a track.
Remix Deck Mode
The included mapping gives you the opportunity to use the remix decks to. However here you are limited to the operation of just one row. The hot cue buttons do indicate if you are dealing with a one-shot or a loop. The four endless rotaries can be switched between loop/browse, volume or filter functions. This way you get a lot of control over the four slots and are you able to use remix decks much more creative then you initially would have expected. But if you really want to get everything out of the remix decks I would advise to use a Kontrol F1 next to the 4TrackTrigger.
Verdict/Conclusion
Although most of my time with the 4TrackTrigger can be explained as very nice and pleasant, there are a few points of criticism. An obvious one is the price, especially when there is no audio interface, so you’ll need an extra ‘box’ when you use the controller at a gig. If we look at other pricy mixers, the trend here is that most of them are having built-in soundcards. For example, more and more new dj Mixers installed in clubs, like Pioneer’s DJM900 or DJM2000, have built-in soundcards.
Something I missed on the controller was a good indication of what kind of hot cue was under a cue button. However this is compensated of course by the feedback you get elsewhere, like the loop size for each track or the LEDs indicating where you are positioned in a track. The fact that the 4TT has so many buttons, rotaries, controls can be explained as overwhelming. But I think this will become a positive fact as a user will get used to this the more and more while he works with the controller. I have to admit the developers have thought this through very well, as everything is placed and mapped in a very logical manner. The result is that it doesn’t take a lot of time before you know where everything is placed and what the functions are, so you can use Traktor to its full creative potential!
I mentioned the price before. The 4TrackTrigger isn’t cheap, however it isn’t really made for your ‘average Joe’ DJ who likes to spin some tracks now and then. Bottom line is that this is a very good (Midi) controller, no doubt about that! This machine is intended for the (Pro) DJ who likes to use Traktor as a tool to give their own interpretation to the tracks they use. The people at Glanzmann have succeeded in creating a great machine for just that!