Before I tell you what I think of the Steinberg CI2+, let me explain how this post came about. Untill a few months ago I had my modest home studio set up with lots of software and audio through a Echo Mia pci soundcard. Lovely, never had any problems with it and the sound quality was great. But my old pc was running old and became… outdated, plus a month ago it even completely crashed. Plans for the purchase of a new system existed but now I was forced to act upon those plans!
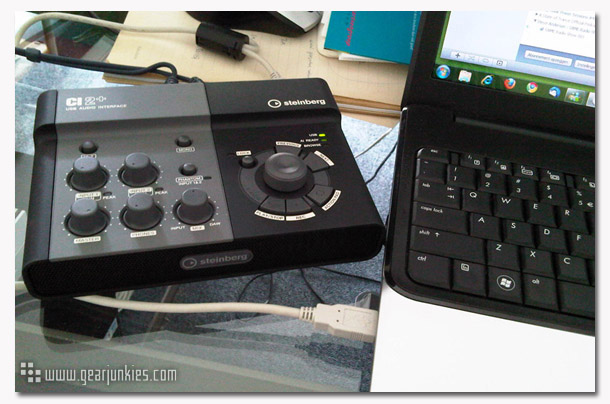
Before I decided on the final specs for a new system I bought a new HP laptop as well. Just to have a backup computer if any new system would give me trouble in the future and so I could take my time deciding what my new system should be. My pc system became a I7 (8 core) running Windows 7 (64 bits). As I found out many new pc systems don’t have pci slots anymore, so my trustworthy Echo Mia became useless overnight. A shame but that’s technologic advancement for you. So I decided to go for a USB audio interface. Being a Cubase user for many years I looked into the recently released CI-series from Steinberg. After some research my decision was to buy the top model, the CI2+ audio interface.
As I now own a laptop and a standard (desktop) PC system I decided to write this review or better called, ‘experience’, using the CI2+ with both. Because, … well because I can.
Telling you how the audio/specs hold up in real life would be boring as most of the new (USB) audio interfaces from different manufacturers have almost the same specifications. And I am sure they will deliver these specifications without any problems.
Installation
Well that’s a breeze. Like any audio interface (USB) it is accompanied by drivers and control software. Installation is within a few minutes, reboot, connect the interface with your PC/Laptop and you are ready to go. For testing purposes I also installed the free Cubase 5 Essentials software that comes along with the CI2+. When you startup Cubase for the first time it asks you (once) if the Yamaha USB ASIO Driver*) should be the Master ASIO driver. Answer with yes and that is it then. You are ready to go! And in my case … yeah, sound is here!
The Interface
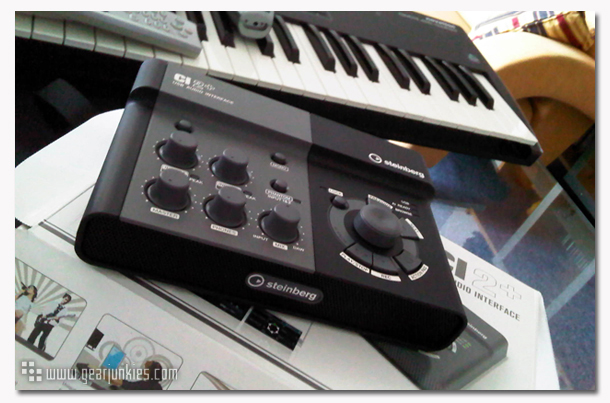
There are two sections on the CI2+. A mixer section and a control section. The mixer section contains the knobs for the two inputs (gain function). One input is a HI-Z input which suits a guitar (or bass guitar) best. With the CI2+ you can also supply phantom power to the analog input jacks, so there is an On/Off button for that. At the bottom three knobs for Master volume, Phones volume and Mix Control. The first two speak for themselves. The Mix Control (Input-DAW) knob balances the signal from the analog input jacks and the signal from your DAW. The layout is pretty simple and straight forward so you won’t have any problem figuring out what they are for.
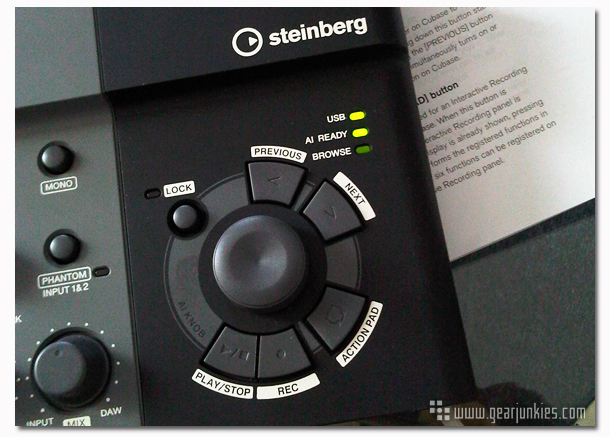
The control section has a big AI-knob surrounded by several push buttons (play/stop, record, previous, next and action pad). This is a multifunction knob with two modes, Normal or Browse. Basically with this knob and the push buttons you can control your Cubase. It replaces several mouse functions if wanted. I can see this being very usefull if you want to record some guitar tracks away from your computer for example. Pushing the button when you are working with(in) Cubase it can take over the browser function. For example if your are browsing for sounds or presets. Also simply move the mouse over any parameter of a plug-in, mixer or anything else in Cubase and you can easily adjust the value by turning the AI Knob.
One of the buttons needs some more explanation and that’s the Action Pad function. This button is used for so called ‘interactive recording’. Pressing this button makes a panel pop up in Cubase. Here you can register up to six transport functions which then can be performed (in order) when you press the action pad button. Again, this function will be very usefull if you want to record external audio from a guitar or other external hardware.

These extra functions of this audio interface are only linked with Steinberg’s own DAW, Cubase. But if you are looking for just an audio interface you can of course hook it up to any PC or MAC system. But then again most DAW manufacturers have their own (dedicated) hardware these days. I personally am a year-long Cubase user so this CI2+ fits my needs perfectly.
Connections/Rear Panel
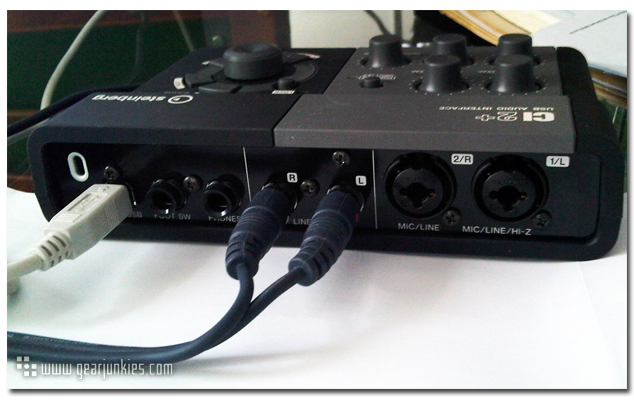
Again very simple. One slot for the USB cable to your PC/Laptop, one connector for a footswith, an output for headphones, two line outputs (L and R) and two XLR combo jacks inputs of which one is with HI-Z. And also there is a connector for a Kensington Lock to secure your CI2+. You never know who wants to borrow it unannounced!
Pro’s and Con’s
All in all I am very happy with my new audio interface. I didn’t have any hassle to get everything installed and working on both my systems. The USB connection is great. The sound is great. It looks great.
One thing however that kinda surprised me was the fact the CI2+ is completely USB-Powered. With my two brand-new systems this worked perfectly. But I am sure that this wouldn’t have been the case with my previous system. So it is almost a must to run this interface on recent systems. This is however an assumption as I wasn’t able to test this! Neither on any other OS. However the CI2+ has cross-platform support on Mac OS X, Windows XP, Windows Vista and Windows 7.
Eric Thoolen
Want more information? Visit the Steinberg website and see what this baby can do for you!
*) Yamaha is the parent company of Steinberg.
Setup for this review/experience:
HP G61 Laptop
Acer I7 PC
Steinberg CI2+
Windows 7 (64 bit)
Update: It seems my PC system is a 4 Core system, not 8. It can handle 8 threads!